Why Medical Device Engineering Is Different
Medical devices aren't just hardware products with extra testing. They're fundamentally different engineering challenges:
Regulatory requirements shape the design from day one. You can't design a consumer product and then "add compliance later." Safety isolation, biocompatibility, electrical safety standards, software validation-these aren't bolt-ons. They're core design constraints that affect your PCB stackup, material selection, firmware architecture, and enclosure design.
Failure isn't an option. Consumer products can have bugs. Medical devices can't. If your blood pressure monitor gives incorrect readings, someone might take the wrong medication. If your surgical instrument fails mid-procedure, you've endangered a patient. This means extensive validation testing, failure mode analysis, and design margins that would be overkill in consumer electronics.
Documentation isn't optional. Regulatory bodies want to see your entire design history file: requirements traceability, design decisions, risk analysis, verification and validation testing, manufacturing procedures, post-market surveillance plans. If you didn't document it, it didn't happen.
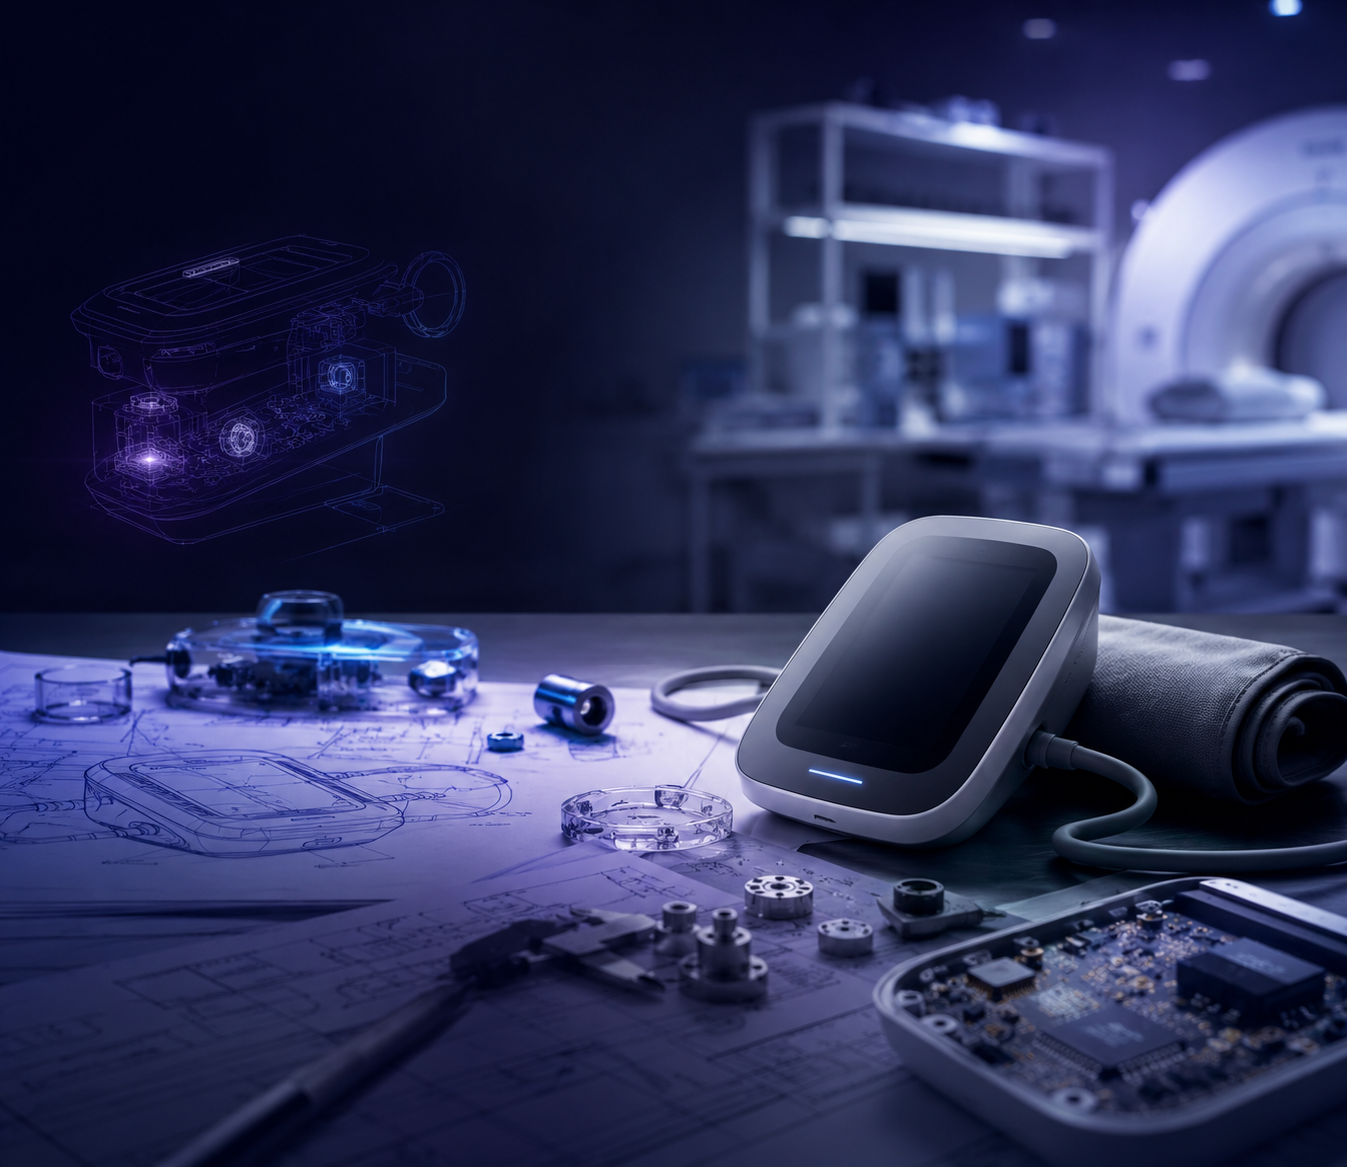
Real Project: Smart Blood Pressure Monitor
We developed a medical-grade blood pressure monitor for home use. It needed precision analog measurement (±3 mmHg accuracy), DC motor control for the inflation pump, wireless connectivity, battery power, and CE medical device certification.
Here's what made it a medical device project instead of a consumer electronics project:
Electrical safety isolation. The device needed to meet IEC 60601-1 electrical safety standards. This meant:
- Minimum 4mm creepage distance between mains voltage and patient-contact circuits
- Double or reinforced insulation
- Earth leakage current limits (<100µA)
- Protective earth monitoring
We designed the PCB with isolated power domains, dedicated clearance zones, and tested leakage current under fault conditions. This added complexity compared to a consumer device where you can run 120V and 5V traces on the same board with basic spacing.
Calibration and traceability. Every unit needed individual calibration against a certified reference standard. We designed a production calibration station, documented the procedure, and implemented traceability (each unit's calibration data stored with serial number).
This isn't "test and ship." It's "calibrate, validate calibration accuracy, document results, store traceability data, then ship."
Pressure sensor accuracy under stress. During early testing, we found pressure readings drifted when users moved their arm during measurement. The problem wasn't the sensor-it was mechanical stress. Arm movement caused the enclosure to flex slightly, deforming the sensor mounting and affecting readings.
Solution: We isolated the pressure sensor with compliant mounting material that absorbed mechanical stress without transferring it to the sensor. Then we validated the fix with extensive mechanical stress testing (drop tests, arm movement simulation, temperature cycling).
This kind of failure analysis and design iteration is standard in medical devices. You can't ship and "fix it in firmware update v2." You have to get it right before certification.
Regulatory pathway. We pursued CE marking under the Medical Device Regulation (MDR). This required:
- Clinical evaluation (literature review + performance data showing device meets accuracy requirements)
- Risk management file (ISO 14971 - identify hazards, estimate risks, implement controls, verify effectiveness)
- Technical documentation (design files, test reports, manufacturing procedures, labeling)
- Quality management system (ISO 13485 - documented procedures for design control, supplier management, complaint handling, corrective actions)
The regulatory work took 4 months and cost $25K in testing, documentation, and notified body fees. This is why medical devices cost more to develop than consumer products.
Result: CE-certified blood pressure monitor shipping to consumers. Accuracy validated to ±3 mmHg. Zero field failures or regulatory complaints after 18 months on market.
Medical Device Development Process: What Actually Happens
Phase 1: Requirements and Regulatory Strategy (Weeks 1-4)
Before designing anything, you need to answer:
- What's the intended use? (This defines regulatory classification)
- What's the regulatory pathway? (FDA 510(k), De Novo, PMA, or CE marking under MDR/IVDR)
- What standards apply? (IEC 60601 electrical safety, ISO 10993 biocompatibility, ISO 14971 risk management, IEC 62304 software, etc.)
- What's the risk classification? (Class I, II, III determines regulatory burden)
We create a Requirements Specification Document covering:
- Clinical requirements (what measurements, what accuracy, what patient population)
- Functional requirements (what the device does)
- Performance requirements (how well it does it)
- Safety requirements (what hazards to mitigate)
- Regulatory requirements (what standards to meet)
- Usability requirements (how users interact with it)
This document becomes the foundation for design verification testing later. If it's not in the requirements, you don't have to test for it. If it is in the requirements, you must validate it works.
Phase 2: Design and Risk Management (Weeks 5-16)
Circuit design with regulatory constraints. You're not just designing a working circuit-you're designing for safety, reliability, and regulatory compliance simultaneously.
Example: Isolation barriers. If your device connects to mains power and contacts the patient, you need isolation between primary and secondary circuits. This affects:
- Power supply design (isolated DC-DC converters, not just LDOs)
- Communication interfaces (optocouplers or digital isolators for UART/SPI crossing isolation barrier)
- PCB layout (maintain creepage/clearance distances)
- Component selection (use certified isolation components with rated withstand voltage)
Risk management runs in parallel. As you design, you identify hazards:
- Electrical shock from insulation failure
- Incorrect measurement from sensor drift
- Software error causing wrong display reading
- Mechanical failure causing injury
- Thermal hazard from component overheating
- Electromagnetic interference affecting accuracy
For each hazard, you estimate probability and severity, then implement risk controls:
- Design controls (isolation barriers, protective earth, fail-safe defaults)
- Manufacturing controls (calibration, inspection, testing)
- Information for users (warnings, training, maintenance requirements)
Then you verify the controls work (testing) and document everything in the Risk Management File.
Material selection matters. If your device contacts the patient (skin, wound, blood), materials need biocompatibility testing per ISO 10993. This includes:
- Cytotoxicity (does it kill cells?)
- Sensitization (does it cause allergic reactions?)
- Irritation (does it cause skin irritation?)
- Systemic toxicity (is it toxic if absorbed?)
We learned this the hard way on a wearable medical device project. The silicone we initially selected hadn't been tested for biocompatibility. Getting it tested added 6 weeks and $8K to the schedule. Now we specify biocompatibility requirements upfront and select pre-tested materials.
Phase 3: Prototype and Verification Testing (Weeks 17-24)
Design verification = does it meet requirements?
You test every requirement in your specification:
- Measurement accuracy (compare against certified reference)
- Temperature range (test at -10°C, +25°C, +40°C, or whatever your spec says)
- Drop test (drop from specified height onto hard surface)
- Electrical safety (leakage current, dielectric strength, protective earth continuity)
- EMC (electromagnetic compatibility - does it emit interference? Is it immune to interference?)
- Software validation (does firmware perform intended functions correctly?)
This isn't "does it work?" testing. This is "does it meet specification under worst-case conditions?" testing. You're trying to break it.
Example test protocol: Accuracy verification for blood pressure monitor.
Test 30 measurements across pressure range (50-250 mmHg). Compare device reading to reference standard. Calculate mean error and standard deviation. Requirement: ±3 mmHg or better for 95% of measurements.
If you fail, you iterate the design and retest. There's no "close enough."
Phase 4: Design Transfer and Production Validation (Weeks 25-32)
Moving from engineering prototype to production unit.
Engineering prototypes are hand-assembled, debugged on the bench, tweaked until they work. Production units are assembled by technicians following documented procedures, with no tweaking allowed.
Design transfer means creating:
- Manufacturing procedures (step-by-step assembly instructions)
- Test procedures (what to test, how to test it, pass/fail criteria)
- Calibration procedures (how to calibrate, acceptance limits)
- Inspection procedures (what to inspect, acceptance criteria)
- Packaging and labeling specifications
Then you validate the process works: Build 10-30 units following the procedures. Test them. Verify they all meet specifications. If they don't, you fix the procedures or the design, then revalidate.
This is where undocumented manufacturing tricks get exposed. If your engineering prototype only works because you "tweak the potentiometer until the reading looks right," that won't fly in production. You need calibration procedures with defined targets and tolerances.
Phase 5: Regulatory Submission and Certification (Weeks 33-48)
For CE marking under MDR:
You submit technical documentation to a Notified Body (EU regulatory authority). They review your design files, risk management, clinical evaluation, quality system, and testing data. If everything is compliant, they issue a CE certificate and you can affix the CE mark and sell in the EU.
Timeline: 3-6 months for review (depends on device risk class and Notified Body workload).
Cost: $15K-$40K for Notified Body fees, plus internal labor for documentation preparation.
For FDA 510(k) clearance:
You demonstrate your device is "substantially equivalent" to a predicate device already on the US market. You submit:
- Device description and intended use
- Performance testing data
- Comparison to predicate device
- Labeling
FDA reviews for 90-180 days (average). If they have questions (Additional Information requests), add 2-4 months.
Cost: $12K-$30K FDA user fees, plus testing and documentation labor.
For higher-risk devices (FDA PMA, Class III CE), timelines extend to 12-24 months and costs reach $100K-$500K+.
What Kills Medical Device Projects
1. "We'll add compliance later"
No. Compliance requirements shape the design. If you design a consumer product and then try to make it regulatory-compliant, you'll redesign 40% of it.
Electrical isolation, safety margins, material selection, software validation-these must be in the design from day one.
2. Underestimating testing costs
Testing is expensive. Electrical safety testing, EMC testing, biocompatibility testing, reliability testing-budget $20K-$40K for a moderately complex device.
Many founders budget $5K for "testing" and then get shocked when the EMC lab quote comes back at $8K for pre-compliance scans and $15K for formal testing.
3. No risk management
Risk management isn't optional. It's required by regulations and it prevents disasters.
If you haven't systematically identified hazards and implemented controls, you'll either catch problems late (expensive fixes) or miss them entirely (field failures, regulatory action, lawsuits).
4. Insufficient documentation
If it's not documented, it didn't happen. Regulators don't care about your verbal explanations. They want written procedures, test reports with data, traceability records.
We use design history file templates from day one. Every design decision, test result, and risk analysis gets documented in real-time. This prevents the end-of-project scramble to recreate six months of decisions from memory.
5. Ignoring usability
Medical devices must be safe for the intended users in the intended use environment. This means usability validation:
- Can users actually operate the device correctly?
- Do they understand the instructions?
- Can they interpret the display?
- What errors do they make and what are the consequences?
We learned this on a home-use medical device. During usability testing, 30% of users initially inserted the component backwards. We redesigned it with asymmetric keying so it only fits one way. Problem solved.
Cost Reality: What Medical Device Development Actually Costs
Here's a realistic budget for a moderately complex medical device (sensor-based diagnostic or monitoring device with wireless connectivity):
Engineering development: $35K-$60K
- Electronics design (schematic, PCB layout, prototype builds)
- Firmware development (device software, BLE stack, power management)
- Mechanical design (enclosure, user interface, DFM)
- Design iteration (testing, fixes, retesting)
Testing and validation: $20K-$40K
- Electrical safety testing (IEC 60601)
- EMC testing (IEC 60601-1-2)
- Biocompatibility testing if patient contact (ISO 10993)
- Environmental testing (temperature, humidity, drop, vibration)
- Accuracy/performance validation
- Software validation
Regulatory pathway: $15K-$40K
- CE marking (Notified Body fees, documentation preparation)
- OR FDA 510(k) (user fees, documentation)
- Clinical evaluation (literature review or clinical study)
- Risk management file creation
- Quality management system setup
Tooling and manufacturing setup: $15K-$35K
- Injection molding tooling (if custom enclosure)
- Manufacturing procedures and training
- Production test fixtures
- Calibration equipment
Total: $85K-$175K for a first medical device project.
This is why you can't build medical devices for $25K. The regulatory and testing requirements are non-negotiable.
Timeline Reality: How Long It Actually Takes
Reasonable timeline for moderately complex medical device:
- Requirements and design: 4 months
- Prototype and verification: 3 months
- Design refinement: 2 months
- Production validation: 2 months
- Regulatory review: 4-6 months
Total: 15-17 months from concept to market authorization.
This assumes an experienced team and no major setbacks. First-time medical device developers should budget 20-24 months.
Fast tracking is possible if you:
- Use proven reference designs (reduces design time)
- Use pre-cleared/CE-marked subassemblies (reduces testing burden)
- Have dedicated regulatory expertise (faster documentation)
- Pursue lower-risk regulatory pathways (Class I exempt FDA or low-risk CE)
When to Work With Us
We take medical device concepts to certified products. Our approach:
We design for compliance from day one. Electrical isolation, safety margins, risk controls-these are in the architecture phase, not bolted on later.
We've navigated regulatory pathways. CE marking under MDR, FDA preparation, ISO 13485 quality systems. We know what regulators want to see.
We prototype fast, but validate rigorously. Quick iteration on the bench, then systematic verification against specifications. No shortcuts on validation.
We hand off to manufacturing. Documented procedures, calibration protocols, test specifications. Your contract manufacturer can build it without calling us every day.
We've shipped medical devices that work. Smart Blood Pressure Monitor: CE certified, ±3 mmHg accuracy, zero field failures after 18 months on market.
If you're developing a medical device and want a team that understands both the engineering and the regulatory requirements, let's talk.
Contact: www.dysol.ae
SHARE ARTICLE